
Caring for Japanese Craft Purchases
Owning Japanese crafts is not just about buying something beautiful. You're learning how to look after them so they last for many years. These handmade pieces are created with care, and they deserve the same attention from you once they become part of your home.
Understanding the Materials
Every type of material, whether wood, ceramic, fabric, or metal, has its own character. Because of this, the way you care for each one is different. Some may need gentle cleaning, others may benefit from regular use, and all will respond to your handling in unique ways. Knowing the right care methods will keep them in good condition and help them age gracefully.
Why Proper Care Matters
When you take the time to care for your Japanese crafts, you do more than protect them. You allow them to slowly adapt to you and your lifestyle. Over time, the colors, textures, and surfaces will change in subtle ways, reflecting the way you use them. This natural transformation is part of the joy of living with handmade Japanese products.

Caring for Japanese Earthenware
Earthenware is one of the oldest forms of Japanese pottery, valued for its warmth, natural beauty, and ability to change with use. Unlike porcelain or stoneware, earthenware is fired at lower temperatures, which leaves it softer, more porous, and slightly heavier in character. These qualities make it distinct but also require a bit of extra care.
What Makes Earthenware Unique
The word for soil in Japanese is tsuchi, and because earthenware is shaped from this natural clay, it is often called tsuchimono, meaning “things of the earth.” Potters work with a clay known as potter’s clay, which is then glazed and fired in a kiln. The firing process is done at relatively low heat compared to other ceramics, and this creates subtle variations in color, surface, and shape. No two pieces ever turn out exactly the same. The changes that happen inside the kiln give each bowl, plate, or cup its own character.
The glaze, which is a glass-like coating applied before firing, gives the piece its shine and provides a layer of protection. Even with glaze, earthenware remains porous, meaning it can absorb water or oil over time. This absorption is part of what makes earthenware feel so organic, but it also leads to visible changes. One of the most recognizable effects is called crazing. This is when fine cracks appear in the glaze, which can cause the surface to take on darker tones or slight discolorations. Far from being seen as a flaw, many collectors and everyday users value this transformation. It shows the piece has been lived with, used, and cared for, and it grows more beautiful with age.
Preparing Earthenware Before Use
Because earthenware naturally absorbs liquid, Japanese tradition includes a process called medome before using a new piece. Medome means “sealing” or “filling,” and it is done to help protect the vessel from unwanted stains or odors. The process involves simmering the piece in water mixed with starch, such as rice water from the first rinse. The starch seeps into the pores of the clay and creates a protective layer that reduces the absorption of oil and moisture. This small step extends the life of the ware, helps prevent dark blotches, and keeps food flavors from lingering in the clay.
Not all earthenware requires medome. The need depends on the type of glaze used and how much protection it already provides. Some modern glazes are dense enough to make medome unnecessary, while others still benefit from the extra treatment. When you buy a new piece, it is always best to follow the care instructions that come with it. These details will tell you whether sealing is recommended or if the glaze is already enough to protect the surface.
Living with Earthenware
One of the charms of Japanese earthenware is that it slowly changes as you use it. The more you eat or drink from it, the more it reflects your daily life. Subtle marks, fine cracks in the glaze, and changes in color tell the story of its time with you. Unlike materials that look the same year after year, earthenware develops a patina that many see as adding depth and warmth.
Proper care will not stop this evolution, nor should it. The goal is not to freeze the piece in time but to allow it to age in a way that feels natural and beautiful. With gentle cleaning, thoughtful handling, and preparation like medome, your earthenware will last for many years, becoming something more personal the longer you live with it.
How to Do Medome
Medome is a traditional sealing method used to prepare new Japanese earthenware before it is used for the first time. The process fills the tiny pores in the clay with starch, making the piece more resistant to stains, odors, and discoloration. While it may sound complicated, it only requires a few everyday items from your kitchen and a bit of patience.
To begin, you will need a cooking pot large enough to hold the piece of earthenware, some waste water from rinsing rice, and a spoonful or two of cooked rice. If rice water is not available, you can use water mixed with potato starch or wheat flour instead. Place the piece in the pot, pour in enough rice water to cover it completely, and add the spoonfuls of cooked rice.
Set the pot on the stove and start heating it slowly. Begin with low heat, then bring it up to medium, always allowing the temperature to rise gradually. Earthenware is fragile when exposed to sudden changes in heat, so rushing the process can cause cracking. Before the water reaches a full boil, lower the heat again and let the pot simmer gently for about fifteen to twenty minutes.
After simmering, switch off the heat and leave the piece sitting in the rice water until the liquid has cooled completely. When it is ready, remove the earthenware, rinse off the sticky residue, and wipe it dry with a soft cloth. Allowing it to air dry fully is important, and if time permits, leaving it soaking in the rice water for several more hours or even half a day can provide extra protection.
If simmering is not possible in your kitchen, there is a simpler alternative. You can soak the new piece in clean water for twelve to twenty-four hours, then rinse and dry it before use. Although this method is less effective than the full starch sealing process, it still helps reduce absorption and prepares the piece for everyday use.
Everyday Care and Use
Once the medome is complete, a few small habits will help preserve your earthenware. Before serving food, rinse the piece in water that matches the temperature of the dish. Use warm water before plating hot meals and cold water before plating chilled ones. This step prevents food odors and oils from seeping into the pores and also keeps the food at the right temperature for longer.
When cleaning, wash earthenware gently with a soft sponge and a mild, neutral dish soap. Rinse thoroughly to remove all soap and avoid letting the piece sit in water for extended periods. Because the clay absorbs moisture, leaving it wet for too long can lead to mold or unpleasant smells. Always dry it completely with a cloth and, if possible, allow it to finish drying in an airy space. Proper ventilation during storage helps the clay stay fresh and prevents trapped moisture.
It is also important to remember that most earthenware is not resistant to sudden heat changes, a problem known as thermal shock. Unless your piece is specifically marked as heat-safe, do not place it in the microwave or oven. The clay can crack or break under direct, intense heat. Treating earthenware as a delicate material rather than as modern cookware will help it last longer and grow more beautiful with time.

Caring for Japanese Porcelain
Porcelain has a long history in Japanese craftsmanship, admired for its balance of delicacy and strength. It begins with porcelain stone, a natural material rich in feldspar and silica. The stone is crushed, kneaded into smooth clay, then carefully shaped before being fired at extremely high temperatures. During firing, the minerals inside the clay undergo vitrification, meaning they transform into glass. This process is what gives porcelain its signature qualities: a smooth, refined surface, impressive durability, and a lightweight, elegant feel in the hand.
Unlike earthenware or stoneware, porcelain is non-porous. It does not absorb liquids, so it resists odors and stains even with daily use. This impermeability makes porcelain particularly practical for both serving and dining. While it may look delicate, it is built to endure, which is why porcelain tableware has been cherished for centuries in Japanese households.
Preparing and Using Porcelain
Before using new porcelain dishes, rinse them gently with water and a mild, neutral dish soap. This removes any dust from the firing or storage process and prepares the surface for food.
When serving meals, it helps to adjust the temperature of the porcelain first. If you plan to serve hot dishes, warm the piece with hot water before plating. For chilled foods, rinse it with cold water instead. This not only enhances the dining experience by keeping food at its intended temperature but also helps shield the porcelain from absorbing remaining food smells or surface discoloration.
Cleaning and Storing Porcelain
Porcelain is easy to clean, but proper care will keep it looking pristine. Use a soft sponge with a gentle dishwashing liquid, and avoid rough scrubbers that can scratch the glaze. Rinse thoroughly after washing so no residue remains, and dry the pieces well before storing them. A dry environment is important, since trapped moisture can encourage mold growth over time, especially if dishes are stacked tightly together.
Most porcelain pieces are safe to use in the microwave, but there are important exceptions. Any porcelain decorated with metallic glazes, such as gold, silver, or platinum accents, should never go in the microwave. The metal can spark, cause the glaze to peel, or even damage the dish. Always check your piece before reheating.
Dealing with Stains on Porcelain
Even though porcelain is less prone to staining than other ceramics, discoloration can still occur, especially from strong oils, teas, or acidic foods. It’s best to treat stains as soon as you notice them, since they become harder to remove if left for long.
For light stains, sprinkle a small amount of baking soda over the affected area and let it sit for about ten minutes. Afterward, rub gently with a soft cloth until the stain lifts. Because baking soda is abrasive, apply only light pressure to avoid dulling the glaze. With proper care, most stains can be removed without leaving a mark.
The Value of Daily Care
Looking after porcelain is simple, but consistent attention keeps its beauty intact. By rinsing before use, washing gently, storing in a dry space, and treating stains promptly, you ensure your porcelain lasts for generations. These small routines not only protect the surface but also preserve the elegance and craftsmanship that make Japanese porcelain so timeless.
How to Handle Stains, Mold, and Chips in Japanese Porcelain
Even the most carefully used porcelain can develop stains, odors, or small chips over time. With the right methods, you can restore both its beauty and function without damaging the piece. Japanese porcelain is durable, but it rewards careful attention when problems arise.
Removing Hard Water Stains and Odors
Porcelain sometimes absorbs minerals from hard water, leaving cloudy marks or faint odors. To restore clarity, fill the item with water, add a small amount of lemon juice, and bring it to a gentle boil. Repeat this process two or three times if needed. The natural citric acid in lemon helps dissolve mineral buildup and refresh the porcelain. If lemons are not available, powdered citric acid works in the same way.
If the odor remains, try a different approach. Fill the piece with water and stir in a spoonful of baking soda. Leave it to soak for about half a day, then rinse thoroughly to remove all traces of baking soda before drying. This method neutralizes leftover smells and refreshes the surface.
Treating Mold on Porcelain
If mold appears, begin by washing the porcelain as you normally would, using a soft sponge and mild dish soap. For stubborn growth in grooves or textured areas, a deeper clean may be necessary. Place the item in boiling water for about ten minutes to disinfect it. To improve the results, add two to three tablespoons of vinegar to the water before boiling. The vinegar increases the sterilizing effect, helping eliminate mold that has settled into small crevices.
Repairing Chips and Cracks
Over years of use, porcelain can develop small chips or cracks. For a quick fix, you can fill minor chips with putty glue. If the item is used for serving food or drinks, always make sure the putty is certified food safe. This provides a smooth surface and prevents further damage.
For a more lasting and traditional repair, consider kintsugi. This Japanese technique restores broken porcelain by sealing cracks with lacquer and then finishing the seams with powdered gold, silver, or platinum. Rather than hiding damage, kintsugi highlights it, turning flaws into a feature that adds character and history to the piece. Many collectors and tea practitioners view kintsugi repairs as giving new life and deeper beauty to ceramics.
If the damage is significant or the item holds personal or monetary value, it is best to contact the manufacturer or a skilled craftsman. Professional restoration ensures the piece is repaired properly and safely for continued use.

Caring for Japanese Glassware
Glassware holds a special place in Japanese craftsmanship. It is admired for its brilliance, its ability to catch and reflect light, and the subtle beauty of its colors and patterns. A simple glass can turn an ordinary meal into something festive, bringing elegance and warmth to the dining table. Beyond appearances, Japanese glass comes in many forms, each with different strengths and uses. Learning how to care for these pieces ensures that they remain vibrant, functional, and safe for years to come.
Types of Japanese Glass
Not all glass is the same, and the variety affects how it should be used and maintained. Soda-lime glass is the most common, offering good clarity and everyday durability. Crystal glass is prized for its clarity, weight, and sound, but requires gentler handling due to its delicate structure. Heat-resistant glass, often used for teapots or cooking vessels, is designed to withstand sudden changes in temperature. Each type reacts differently to heat, pressure, and cleaning methods, so knowing which you own helps you protect it properly.
First Use and Daily Cleaning
When using new glassware for the first time, it should be rinsed lightly to remove any residue from production or packaging. For regular cleaning, use a soft sponge with a mild, neutral dish soap. Avoid harsh detergents or scrubbing pads, which can leave scratches that dull the shine over time. After washing, rinse thoroughly to remove soap film and dry immediately with a clean cloth. Air drying often leaves water spots, so wiping by hand helps maintain the glass’s clarity. Cloths made from non-woven fabric or linen are best, as they leave no lint behind.
Heat and Handling Precautions
Most Japanese glassware is not designed for high heat. Unless you own heat-resistant glass, avoid using it in microwaves, ovens, or dishwashers. Sudden temperature changes can cause cracking, and repeated machine washing can erode fine details or weaken delicate edges. Handles, stems, and decorations are especially vulnerable. A hand-painted rim or finely cut pattern may lose its sharpness or even chip if not handled carefully. Treat glass as you would a fragile heirloom: use both hands when carrying and avoid stacking pieces directly on top of each other.
Preventing and Treating Cloudiness
Even when cleaned properly, glass sometimes becomes cloudy. This often happens because of calcium deposits from hard tap water or oil left behind from food and drink. The fix depends on the cause. For calcium buildup, soak a soft cloth in a small amount of vinegar and wipe the glass gently, then rinse with hot water and dry immediately. Vinegar works because its acidity neutralizes the alkaline calcium. For oil residue, use baking soda instead. Lightly dampen the glass, sprinkle a little baking soda, and polish it with crumpled plastic wrap. A sponge absorbs the powder too quickly, so it is less effective. After polishing, rinse well with hot water and dry completely. Crystal glass should not be cleaned with vinegar or baking soda, as these treatments can damage its surface.
Dealing with Stains
Tea and coffee often leave brown marks that are harder to remove than simple cloudiness. Before treating these stains, check if your glass has any non-glass components such as wooden handles, resin parts, or metal accents. These materials may not be safe for bleach exposure. If the piece is fully glass, soak it in diluted bleach for about thirty minutes, then rinse thoroughly until no odor remains. This method restores the brightness of the glass and removes stubborn stains without heavy scrubbing.
Chips, Cracks, and Repairs
Glass is fragile, and even with care, small chips or cracks can happen. These flaws not only affect appearance but may also weaken the structure of the piece. In some cases, manufacturers or specialist repair services can fix chips by carefully shaving or polishing the edges. This process smooths out rough spots and makes the glass safe to use again. Cracks, however, are usually permanent and may worsen over time, so it is best to retire cracked pieces from regular use to avoid breakage during meals.
Long-Term Care for Japanese Glassware
Proper maintenance is about more than cleaning. It is about respecting the material and extending its life so it can continue to bring beauty to everyday rituals. Handle glassware with care, avoid exposing it to extreme heat, and clean it thoughtfully. By preventing stains, polishing away cloudiness, and repairing damage when possible, you keep these pieces in their best condition. Well-maintained Japanese glassware will not only shine on your table but will also carry memories of meals and gatherings for years to come.

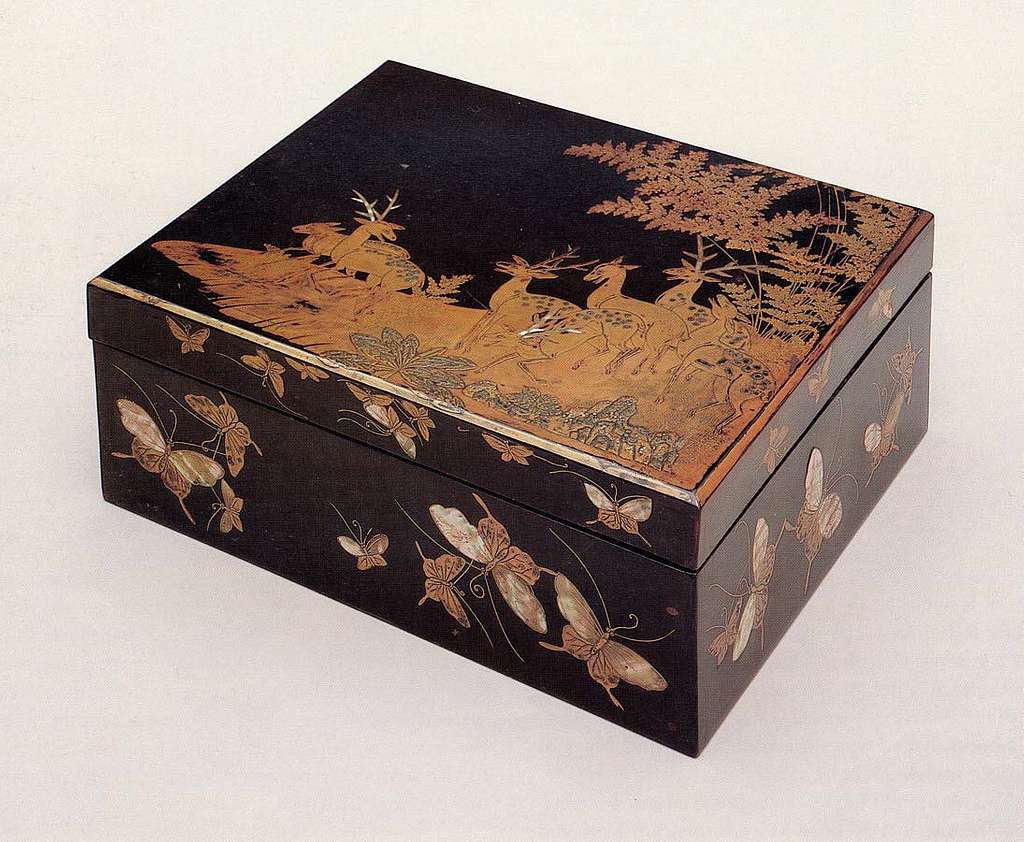
Caring for Japanese Lacquerware
Japanese lacquerware is made by coating wood or other materials with many thin layers of natural lacquer, a sap taken from the lacquer tree. This traditional craft has been valued for centuries because it combines beauty with function. Properly cared for, lacquerware can last for generations while growing more attractive over time.
The Qualities of Lacquerware
Lacquer is not only decorative but also protective. Once hardened, it forms a surface that is highly durable, water-resistant, and able to withstand heat. It naturally resists bacteria and mold, which makes it especially well-suited for tableware and household objects. Unlike many materials that wear down with age, lacquer becomes richer and glossier the more it is used and gently maintained. Daily washing and drying keeps the surface healthy and helps it slowly develop a deeper luster that collectors and users treasure.
Managing New Lacquerware Smell
Freshly made lacquerware often carries a noticeable smell from the lacquer itself. This is normal and fades with time. If the scent is too strong, leave the item in a shaded, airy spot for two to four weeks, and the odor will naturally disappear. For a quicker solution, some traditional methods can help. Placing the piece in a box filled with raw rice for several days draws out the smell, while another common trick is wiping the surface with the cloudy rinse water from washing rice, mixed with a splash of vinegar. Both techniques are gentle and safe for the finish.
Everyday Cleaning and Washing
Lacquerware should always be washed by hand. Use a soft sponge with mild dishwashing liquid and rinse with lukewarm water. Warm water enhances the natural shine, but for greasy or oily residue, cool water is more effective. Avoid leaving pieces to soak, since prolonged exposure can lead to warping or peeling. Once clean, dry them right away with a soft cloth. This prevents calcium deposits from tap water from leaving a cloudy residue on the surface. After drying, store the pieces in a shaded, well-ventilated space so the lacquer can continue to breathe.
What to Avoid with Lacquerware
Lacquerware does not tolerate sudden temperature changes. Placing it in a dishwasher, microwave, or refrigerator can cause the material to crack or warp. Direct sunlight and strong artificial lighting also dull the finish, so always store and display pieces in places protected from heat and harsh light. Treating the surface gently will keep the coating intact and preserve its natural glow.
Dealing with Stains and Discoloration
For stubborn stains, a brief soak of five to ten minutes in hot or cold water is safe, followed by gentle washing with a sponge and mild soap. Do not leave the item submerged for longer, as this risks damaging the layers of lacquer. If heat exposure causes the surface to turn cloudy or milky white, the lacquer has softened and must be reapplied. A dull finish caused by too much light exposure can often be restored with professional refinishing.
Mold Care and Prevention
Lacquerware is naturally resistant to bacteria, but mold can sometimes appear if stored in damp conditions. White mold is usually superficial and can be wiped away using a soft cloth dampened with rubbing alcohol. However, black or blue mold often indicates deeper penetration into the material and is harder to treat. In those cases, it is best to seek guidance from the manufacturer or a repair specialist.
Scratches, Chips, and Repairs
Like any handmade craft, lacquerware may develop scratches, chips, or peeling over years of use. Small scratches or areas of peeling should be addressed early by having a new layer of lacquer applied. Chips and cracks can also be repaired with lacquer, but it is important to consult a professional repair shop before the damage spreads. Many workshops and artisans offer restoration services to ensure pieces remain strong and beautiful.
Living with Lacquerware
Caring for lacquerware is more than maintenance. It is part of the experience of owning it. Each time you wash, dry, and handle the piece, you contribute to the slow transformation of its surface. Over the years, the lacquer deepens in shine, showing the history of its use in your daily life. This living quality is one of the reasons Japanese lacquerware is so valued, making it both functional and deeply personal.

Caring for Japanese Tinware
Tinware holds a special place among Japanese crafts. Unlike harder metals, tin is soft enough to bend with your hands, which gives it a distinct character that sets it apart. Its surface shines with a subtle glow that feels gentle rather than flashy. This quiet brilliance is long-lasting because tin naturally resists oxidation. Beyond its beauty, the metal also has impressive qualities: it conducts heat efficiently and even changes the texture of liquids, making cold drinks taste smoother. For this reason, tin cups are often used for sake, beer, and water, enhancing both the flavor and the drinking experience.
First Use and Daily Cleaning
Before using a new piece of tinware, give it a light wash with a soft sponge and a mild dish soap, then rinse thoroughly. This simple step prepares the surface for safe use. After everyday meals or drinks, clean your tinware the same way. Always dry it immediately with a soft cloth so no water spots form on the surface. Unlike stainless steel, tin scratches easily, so avoid using steel wool, scrub brushes, or abrasive powders. These can wear away the shine and leave marks that are difficult to remove.
Temperature Precautions
One of tin’s defining traits is its low melting point. Because of this, you should never expose it to open flames or place it near a hot stove. Even high oven heat can damage or warp the metal. On the opposite end of the spectrum, tin can also be weakened by freezing temperatures. Storing tinware in the freezer or keeping it in the refrigerator for long periods may cause the structure of the metal to deteriorate. For the longest life, keep your pieces at room temperature and only chill them briefly before serving cold drinks.
Preventing Stains and Dullness
With time, you may notice dark spots or a loss of shine. These changes are natural but can be managed. To restore brightness, apply a small amount of regular toothpaste to your finger or to a piece of soft gauze, then gently rub the affected area. After polishing, rinse the tin with lukewarm water, wash with a mild soap, and dry with a soft cloth. Avoid leaving coffee, tea, or other dark liquids sitting inside for too long. The pigments can discolor the surface if they remain in contact for hours. Making a habit of rinsing out the vessel right after use will keep the surface looking clean and prevent long-term stains.
Building a Lasting Relationship with Tinware
Caring for tinware is not complicated, but it does require consistency. By washing gently, keeping it away from extreme temperatures, and treating stains promptly, your pieces will stay beautiful for years. Over time, tinware develops subtle changes in tone and texture that reflect your daily use. This quiet aging process is part of its charm, making each piece unique to the person who owns it. Proper care allows you to enjoy both the function and the quiet beauty of Japanese tinware while deepening your connection with this traditional craft.

Caring for Wooden Japanese Wares
Wooden Japanese wares bring a warmth and calmness that no other material can match. The soft grain, natural feel, and subtle textures create a quiet sense of peace in daily use. Beyond their beauty, they are practical as well. Wood is lightweight yet strong, and because it does not conduct heat quickly, it is especially suited for items that hold hot drinks or food.
Understanding Different Wood Finishes
Not all wooden wares are treated the same way. The surface finish determines how each item should be cared for. Some are coated with natural oils or beeswax, which protect the grain while allowing the wood to breathe. Others are sealed with polyurethane resin, which creates a strong layer but may initially carry a distinct odor. There are also items finished with glass coatings that give a glossy, protective surface. Learning what type of finish your piece has will guide you in handling and cleaning it properly.
Handling Polyurethane-Coated Wares
When a wooden vessel has been finished with polyurethane, it can sometimes release a resin smell. This is normal and fades over time. The simplest solution is to place the piece in a shaded, well-ventilated space for a couple of weeks. If you are dealing with a container like a bowl or cup, you can speed up the process by repeatedly filling it with lukewarm water and then pouring the water out once it cools. This gradual rinsing helps carry away the odor naturally.
Cleaning and Everyday Care
Wood should never be left soaking in water. Prolonged exposure leads to mold growth, warping, and even cracks in the grain. For pieces with a finished surface, gentle washing with a soft sponge and a mild, neutral dishwashing liquid is usually enough. Untreated wood, however, absorbs liquids easily. Because of that, soap should be avoided unless absolutely necessary, such as after holding raw food, fish, or oils that might leave behind residue. In those cases, use a small amount of neutral detergent, then rinse thoroughly.
After washing, it is important to dry wood immediately. Use a soft cloth to wipe away all moisture and then place the item in a well-ventilated spot. Direct sunlight should be avoided, as it can cause uneven drying and cracking.
Protecting Wood from Heat and Cold
Wood does not respond well to sudden or extreme changes in temperature. Microwaves, ovens, and dishwashers should always be avoided, as they can strip finishes, cause peeling, or split the wood. Similarly, storing wooden pieces in a refrigerator for long stretches can create stress within the grain, leading to cracks or distortions. Keeping wooden wares at room temperature in stable conditions will extend their lifespan and preserve their beauty.
Restoring Rough or Scratched Surfaces
With regular use, wooden items may develop scratches or feel slightly rough. This is not damage but part of their natural aging process. You can restore smoothness and sheen by applying a light coat of vegetable oil, such as perilla or flaxseed oil. Soak a clean cloth with a small amount of oil and gently rub it into the affected areas, following the direction of the grain. This not only repairs the surface but also nourishes the wood, helping it retain its natural glow.
A Lasting Relationship with Wooden Wares
Every piece of wooden Japanese craft changes slowly as you use it. With the right care, the grain deepens, the finish matures, and the ware becomes more personal over time. By handling it gently, cleaning it properly, and protecting it from harsh conditions, you ensure that these items remain durable, beautiful, and meaningful companions in your daily life.

Leather Care and Maintenance
Leather has a unique quality that sets it apart from other materials. Over time, it softens, develops a natural shine, and takes on a character shaped by how it is used. This gradual transformation is one of the main reasons people form such strong bonds with their leather goods. The durability and breathability of leather mean that, with the right care, a single piece can last for decades and even become more beautiful with age.
The Role of Water in Leather Care
One of the biggest threats to leather is water. Moisture can leave stains, cause discoloration, and weaken the fibers over time. Light-colored leather is especially vulnerable, since marks and spots show more easily. If you want to preserve a clean, polished look, waterproofing treatments are essential. A protective spray or cream forms a barrier that shields the surface without changing its natural feel.
That said, not everyone wants their leather to remain flawless. Some owners prefer to let the material evolve, showing signs of age and use. If you value the natural patina and character that comes with time, you can minimize waterproofing and only apply it when needed. For example, during rainy seasons or in humid climates, a light treatment will protect against permanent damage while still allowing the leather to develop its own story.
Cleaning and Storing Leather Goods
Regular cleaning is one of the simplest yet most important parts of leather maintenance. After each use, wipe away dust, dirt, or marks with a dry cloth or use a soft leather brush. This prevents buildup that can dull the surface or scratch the finish.
Storage is just as important as cleaning. Leather naturally molds itself to how it is handled, so poor storage can leave unwanted folds, creases, or dents. Handles and straps on bags are particularly prone to creasing if left unsupported. When putting a leather bag away for a long period, stuff the interior with towels or crumpled newspaper. This not only helps maintain its shape but also absorbs excess moisture that could lead to mold or mildew. Wrapping the bag in a breathable cloth adds another layer of protection, shielding it from dust while still allowing airflow.
Conditioning to Prevent Cracks
Leather can dry out over time, especially if it is exposed to heat, sunlight, or dry air. Without moisture, the fibers stiffen and eventually crack. To prevent this, conditioning is essential. A high-quality leather oil or cream restores suppleness and keeps the material flexible.
Bags that are not handled daily usually benefit from an oil treatment every other month. Smaller items such as wallets, belts, or pouches absorb natural oils from your hands through regular use, so they may not need conditioning as often. For these, a seasonal treatment is usually enough. The key is to pay attention to the feel of the leather. If it starts to feel stiff, it is time to apply oil.
Tools for Leather Maintenance
Caring for leather requires only a few basic tools. A leather-cleaning brush helps remove dirt without scratching. A soft cloth or sponge is used to apply oil or cream evenly, while a separate clean cloth is reserved for buffing the surface to a smooth, polished finish. With these simple tools and consistent care, your leather goods will not only last but also grow more beautiful with each passing year.
How to Clean and Condition Leather at Home
Leather is one of the most durable and rewarding materials you can own, but it needs proper care to stay strong and attractive. Cleaning and conditioning leather is simple if you follow the right steps. With just a few tools and consistent attention, you can keep your bags, shoes, and accessories looking their best for years.
Step 1: Clean the Surface
Before applying any oil or cream, always start by cleaning the leather. Use a soft leather brush to gently sweep away dust, fingerprints, and surface dirt. This prevents particles from grinding into the material when you apply conditioner.
If the leather is heavily soiled, use a towel that has been dampened and thoroughly wrung out. It should be only slightly moist, not wet. Wipe the leather slowly to soften and lift away grime. Avoid soaking the surface, since water weakens leather fibers and can leave permanent marks.
Step 2: Apply Leather Oil or Cream
Once the surface is clean, it’s time to condition. Put a small amount of leather oil or cream onto a clean, soft cloth or sponge. Apply it in light layers, working it into the leather with gentle circular motions.
The key here is moderation. Too much oil can cause blotches, discoloration, or a sticky film that attracts more dirt. The right amount is when the surface feels lightly nourished and slightly moist to the touch. If the leather feels tacky or oily, you have applied too much. Simply wipe away the excess with another clean cloth until the finish is smooth again.
Step 3: Don’t Forget the Hardware
Metal parts like zippers, buckles, and pulls often get overlooked, but they also benefit from conditioning. Rubbing a little oil or cream onto these areas helps prevent rust and ensures that zippers move smoothly without catching. Taking care of the hardware is just as important as protecting the leather itself, since broken zippers or corroded parts can shorten the life of your item.
Step 4: Let It Absorb
After conditioning, set the item aside and allow the oil or cream to sink into the leather. This rest period gives the fibers time to absorb moisture and nutrients, which restores flexibility and prevents cracking. Skipping this step can leave the surface greasy or uneven.
Step 5: Buff for a Natural Shine
The final step is buffing. Use a fresh, dry cloth to polish the leather in steady, gentle motions. Buffing evens out the conditioner, removes any remaining residue, and brings out the natural shine of the material. After this step, the leather should feel soft, smooth, and refreshed, with a subtle glow.
With these five steps, you can clean and condition leather bags, shoes, wallets, and other accessories at home without professional help. Done regularly, this simple routine protects your investment, keeps leather supple, and allows it to age beautifully over time.
Troubleshooting Common Leather Problems
Even with regular care, leather can sometimes develop problems. White residue, mold, water stains, and rust on hardware are all issues that may appear over time. Knowing how to address them quickly and safely will keep your leather products in good condition and extend their life.
Spew on Leather
Spew is a white, powdery layer that can sometimes form on the surface of leather. It happens when natural oils inside the material rise to the surface and crystallize after contact with air. While it may look like damage, it is not harmful. To clean it, gently wipe away the residue with a soft cloth. Afterward, apply a thin layer of leather oil or cream to nourish the material and prevent more buildup. Consistent conditioning also helps keep spew from returning.
Mold on Leather
Mold is a more serious concern, especially in humid environments where leather easily absorbs moisture. If you see a small amount, start by wiping it with a cloth that has been dampened and wrung out thoroughly, then follow with a dry cloth to remove leftover moisture. For stubborn mold, dab the affected area with a cloth lightly soaked in ethanol. Because alcohol can cause fading or discoloration, always test it on an inconspicuous spot before applying it more broadly. Once the mold is gone, apply leather cream to restore protection, then buff the surface with a dry cloth. Allow the piece to dry fully in a shaded, ventilated place. If the mold problem is extensive or you are not confident about treating it yourself, a professional leather repair shop is the safest option.
Water Marks and Stains
Rain and accidental spills can leave uneven marks on leather. To fix this, dampen a towel, wring it out so it is only slightly wet, and wipe across the area to blend the stain into the surrounding leather. Then, use a dry cloth to remove excess water. For shoes or bags, stuff the inside with newspaper or towels to help absorb moisture and keep their shape while drying. Always let leather dry slowly in a cool, airy space, never in direct sunlight or near heaters, which can cause cracking. Before the piece dries completely, apply a small amount of leather oil to restore softness and prevent the fibers from stiffening.
Rust on Metal Hardware
Leather bags, belts, and accessories often have metal parts like buckles, clasps, or zippers. Over time, these can develop blue rust or corrosion. To clean them, put a little leather cleaner on a soft cloth and wipe the rust away. If the rust is in a tight area, a cotton swab works well for precision. After removing the buildup, polish the metal with a dedicated metal polisher, or use a cloth or cotton swab dipped lightly in vinegar as an alternative. Finish by drying thoroughly to prevent future rusting.

Building a Lasting Connection
Caring for your purchases is a way of building a deeper connection with each piece. By handling them thoughtfully, you ensure they remain functional, beautiful, and meaningful for years to come. With proper care, your Japanese crafts will continue to enrich your daily life while carrying your personal touch.

