
Garden Rooms Guide: Ideas, Costs, Planning Permission, Garden Offices
Garden Rooms: Creating Outdoor Living Spaces
A garden room is an outdoor space designed to feel like a natural extension of the home. Unlike a patio or terrace that sits directly beside a house, a garden room is usually set apart, surrounded by plants, hedges, or walls that shape it into a defined area. The enclosure doesn’t need to be solid. Even tall shrubs or layered greenery can create the sense of privacy that gives the space its room-like quality. Openings are left for walkways, and while seating or tables are often added, furniture isn’t required for the area to function as a true garden room.
The idea of carving out a separate room in the garden has been part of landscaping for centuries. Larger gardens often benefit most, since they can be divided into distinct zones that serve different purposes. A garden room can break up the layout, add variety, and give structure to the overall design. Small gardens sometimes naturally take on a room-like shape because of their size, but the term is mostly applied to bigger outdoor spaces where multiple areas can be created.
In colder or windier climates, a garden room can also act as shelter for both people and plants. The enclosed design can help protect delicate flowers and seasonal displays, which is one reason famous gardens such as Hidcote Manor have used them to great effect. These protected spaces make it easier to highlight certain plants during peak bloom while shielding them from harsh weather.
The term “garden room” is also used in architecture, though with a slightly different meaning. In that context, it often refers to a conservatory, sunroom, or any room inside a house that looks out onto the garden or uses garden-inspired décor. Freestanding structures placed within a garden, such as gazebos, summer houses, or garden houses, serve a related purpose but are typically given their own names.
While many people enjoy the concept, not all gardeners agree on the label. Some find it useful, while others feel it’s overused. Still, the idea of turning part of a garden into a defined outdoor living space remains a lasting element of garden design.

History of Garden Rooms
Roman origins in Pliny the Younger
The history of garden rooms goes back to Roman villa culture. In the first and second centuries CE, Pliny the Younger wrote long letters about two large country gardens he owned. One stood by the sea. The other sat in the Tuscan hills and rose across many terraces. His descriptions can be hard to untangle, but one point is plain. He prized clear views that reached beyond the planted space. Paths, steps, and level changes shaped how you moved and where you looked. The layout lets you feel sheltered while your eyes carry past the garden to the coast or the hills. That blend of enclosure and outlook sits at the heart of the idea of a garden room in Roman garden design.
Medieval walled gardens and controlled entry
Medieval sources show a different but related pattern. Paintings, poems, and accounts from the time say that enclosures defined gardens and parks. Writers dwell on gates and doorways and how people entered and left. Most gardens were walled and then divided again inside. Hedges and narrow paths carved the space into smaller rooms. Boundaries offered privacy and calm. They also gave protection from wind and animals and helped gardeners care for tender plants. This focus on strong limits and guided movement shaped the daily use of medieval walled gardens.
Hortus conclusus and the garden of love
The best-known medieval model is the hortus conclusus, the enclosed garden. In Christian art, it is a setting for the Virgin Mary. The walls signal purity, safety, and separation from the outside world. Alongside that sacred image ran a secular counterpart known as the garden of love. It was just as enclosed and often quite small. Couples met inside a tight, private space with a lawn, a tree, a bench, or a fountain. Both types highlight what mattered then. Clear borders. Controlled entries. A compact plan that reads like a room. These traditions fixed the idea of enclosure at the center of medieval garden design and set the stage for later garden rooms.
Italian Renaissance Gardens and the Giardino Segreto
Italian Renaissance gardens often rose on steep hills that demanded terraces. Designers carved the slope into stepped levels so people could walk, pause, and look out. Each platform acted like its own outdoor room. The stone walls held the earth, slowed runoff, and created warmer pockets of air that helped tender plants grow. Paths and stairs stitched the levels together and guided the eye along clear lines.
The Giardino Segreto or Secret Garden
Within these large grounds, owners often kept a small private enclosure called a giardino segreto. The phrase means secret garden, and you will see versions of it in other languages. This space sat close to the house or at the end of a formal axis, tucked away from busy parts of the estate. Tall hedges or solid walls screened it from view. Inside, the plan was simple and ordered. Low beds edged with boxwood formed neat patterns. Fragrant herbs, roses, and seasonal flowers filled the air. Benches, a small fountain, or a shaded walk made it a calm place to read, talk, or think. The goal was intimacy and control, not show.
Terraced Gardens on Hillsides
Hilly sites shaped Italian garden design in the fifteenth and sixteenth centuries CE. Terraces solved hard ground conditions and turned the slope into a sequence of scenes. One level might hold a parterre. Another might carry a grove for shade. A higher landing could host a lookout or small pavilion. Water moved from top to bottom in rills and basins, cooling the air as it fell. This layered structure gave long views and short views, sun and shade, quiet corners and public courts, all within one plan.
Borrowed Scenery and Framed Views
Designers in steep Italian gardens used borrowed scenery to extend the composition beyond the property line. They aligned paths, stairs, and openings to capture the countryside. A balustrade might frame a valley. A gap in the hedge might reveal a town or a winding river. A small tower or belvedere could lift visitors above the treetops for a wide panorama. By treating distant hills and fields as part of the picture, the garden felt larger and more dramatic. The giardino segreto benefited from this approach too. Its narrow door or side window might offer a single precise view that made the enclosed space feel both secluded and connected to the wider landscape.
Planting, Materials, and Microclimate
Evergreen hedges gave structure year-round. Citrus in movable pots brought scent and color when the weather allowed. Stone, gravel, and brick kept surfaces clean and easy to maintain on sloped ground. The terrace walls absorbed heat during the day and released it at night, softening temperature swings. That microclimate protected delicate specimens and prolonged bloom. In a secret garden, the same effects made a small area comfortable and sheltered even on exposed hills.
Movement, Privacy, and Use
Clear geometry kept movement simple on complex terrain. Straight walks and central axes helped visitors understand where to go, while stairs offered smooth climbs from one level to the next. Privacy was managed by height and thickness. High hedges blocked sight. Low borders guided the step. The giardino segreto relied on this careful control. It was meant for quiet conversation, study, or contemplation, not public display. Its scale and planting supported that purpose.
Lasting Influence of the Giardino Segreto
The idea of a secret garden stayed popular because it met a basic need inside grand landscapes. People wanted a retreat within a larger framework. The term giardino segreto captured that wish so well that it passed easily into other tongues. In Italian Renaissance gardens, especially on steep sites with many terraces, this small enclosed room and the borrowed scenery beyond it worked together. One space gave privacy and order. The other offered long views and a sense of place. That balance is still a model for Italian garden design today.

French formal garden rooms and bosquets
In the seventeenth and eighteenth centuries, the French formal garden set out to extend the house into nature and to project the garden into the wider landscape. Designers used long straight axes and distant views that ran past the formal boundary and out toward the countryside. Farther from the residence, large blocks of planted woodland called bosquets filled much of the ground. A bosquet was not wild. It was dense, carefully managed woodland cut into geometric compartments and wrapped in tall clipped hedges. In the largest estates, including the Gardens of Versailles, these hedges could rise to about twenty feet, which turned open ground into outdoor rooms and corridors with a strong sense of order and privacy.
Inside and between these compartments, paths led visitors to small rooms set within the green structure. In period language, these rooms were called cabinets, a word that then meant a room in both French and English, much like a modern study or home office. You will also see the names salles vertes and salles de verdure, which translate to green rooms or rooms of greenery. Each cabinet focused attention on a single feature. It might be a statue set on a plinth, a jetting fountain, a single specimen tree, or a piece of topiary shaped to resemble the geometry around it. The effect was theatrical. Guests moved through enclosed woodland and arrived at a quiet stage where the scene was set by water, sculpture, or living architecture.
The English equivalent was called a wilderness. Despite the name, it followed a similar program. Designers divided the ground into regular quarters and planted thick greenery to make a series of enclosed spaces. The wilderness used the same language of compartments, rooms, and surprise, and it often included statues, fountains, or trimmed evergreens as focal points. The difference lay in how one arrived. French rooms usually opened from straight walks that emphasized axis and symmetry. Many English examples favored curving approaches that softened the reveal and increased the sense of seclusion.
Versailles bosquets and named garden rooms
Versailles pushed the bosquet idea to a peak. Each bosquet contained a large central room devoted to a major feature. Some rooms centered on a grand sculptural fountain. Others framed a dramatic cascade, a garden amphitheatre for performance and ceremony, or a ring of columns that turned greenery into architecture. The bosquets took their names from these dominant pieces, so the identity of each room was clear the moment you heard it mentioned. This naming reinforced wayfinding, court ritual, and the story the garden told about power, art, and control over nature.
The experience was planned as a sequence. Visitors left the open parterres near the palace, entered the shaded grid of clipped woodland, followed gravel paths screened by high hedges, and then stepped into a sudden clearing where water sounded, stone gleamed, and light pooled. The hedges created a calm microclimate, reduced wind, and heightened the contrast between dark shade and bright center. The layout also supported festivals, musical performances, and formal receptions, since each room worked like a small theater with a defined front and a focused view.
Dezallier d'Argenville and the design of cabinets and salons
The leading French textbook of the era, La Theorie et la pratique du jardinage by Dezallier d'Argenville, published in 1709, set out clear patterns for these rooms. His plans show modest but intricate Cabinets et Salons pour des bosquets that keep the core elements of the grand model while fitting smaller sites. Benches line the edges so visitors can rest and admire the central piece. The focal point might be a fountain, a small tree chosen for form or seasonal color, or a precise topiary that anchors the geometry. The plans typically allow between one and four entrances so the designer can control circulation and sightlines. In his illustrations, each entry is a straight walk that meets the room squarely, which reinforces the classical emphasis on clarity, axis, and direct approach.
These patterns did not only dictate decoration. They shaped maintenance and growth. Straight entries simplified pruning and kept sightlines clean. The tall hedges required regular clipping with ladders and careful training over time, but in return, they delivered crisp walls of foliage that behaved like architecture and framed every view and sound within the room.
English wilderness design, Jan Kip, and Castle Howard
Around the same period, the engravings of Jan Kip show how English gardens adapted the idea. His views from about seventeen hundred five to seventeen hundred twenty often depict curving paths that snake through the quarters of a wilderness before reaching the inner room. The bend in the path keeps people inside out of sight until a newcomer is very close. This small delay adds a sense of discovery and privacy that suits conversation and quiet retreat as much as display. Castle Howard offers a clear example of this approach, with winding walks that deliver you to enclosed clearings at the heart of the planted grid.
The contrast is instructive. French formal garden rooms privilege directness, long lines, and strict geometry. English wilderness rooms use similar structures but lean on curvature and concealment to change the rhythm of arrival. Both traditions rely on the same toolkit of bosquet, hedge, path, focal feature, and named room. Both turn planted woodland into a sequence of outdoor living spaces that blend sculpture, water, and controlled greenery.
How garden rooms worked inside the formal plan
Across France and England, these garden rooms served as anchors within a larger plan that reached into the surrounding landscape. Straight avenues could extend beyond the formal enclosure and align with distant woods or fields, while the rooms provided pauses along the route. Each cabinet or salle de verdure gave the eye a place to rest and gave guests a destination with purpose. The naming of rooms tied memory to place. The set pieces at the center made maintenance worth the effort, since a single well-kept fountain or a carefully shaped evergreen could carry an entire space.
Taken together, the bosquet and its garden room turned clipped woodland into architecture. They delivered the hallmark traits of the French formal garden and informed the English wilderness garden, shaping how people moved, where they gathered, and what they saw and heard at every step. For anyone studying Versailles gardens, French baroque garden design, English wilderness gardens, or the history of garden rooms, these spaces explain how geometry, planting, and crafted features worked together to create order, spectacle, and intimate retreat all at once.

Sheltered flower gardens in the English Baroque
During the period of the English Baroque, designers not only built wildernesses filled with winding paths and green enclosures but also developed another type of intimate space: the sheltered flower garden. These enclosed plots were laid out with the same sense of order and geometry that shaped the broader grounds, yet they focused on displaying flowers in carefully arranged beds.
Garden writers and visitors of the time often described these spaces as being in the “Dutch style.” Whether this label was accurate or not, it reflected the strong influence that Dutch horticulture and design were thought to have on English taste in the late seventeenth and early eighteenth centuries. The Dutch Republic had long been associated with mastery in growing and hybridizing flowers, especially tulips, and with a tradition of compact, enclosed gardens suited to its towns and estates.
In England, this translated into sheltered garden rooms bordered by clipped hedges or low walls that created a calm microclimate. Within these boundaries, flowers could be grown more securely, safe from wind and grazing animals, while also being presented in striking patterns. These spaces often acted as retreats for quiet enjoyment, where visitors could step away from the larger landscape and experience concentrated color, fragrance, and seasonal variety up close.
The fashion for such Dutch-style flower gardens blended ornamental display with botanical interest, reflecting both the English appetite for spectacle and the influence of continental trends. They stood alongside wilderness rooms and other Baroque garden features, adding yet another layer of variety and intimacy to the overall design.
Dutch-style flower gardens in the English Baroque
In the late seventeenth and early eighteenth centuries, English Baroque gardens began to absorb influences from continental Europe. Among the features that became fashionable were sheltered flower gardens that contemporaries often described as being in the Dutch style. Whether this label was fully accurate or more of a cultural impression, the association with Dutch horticulture was strong. The Dutch Republic at that time had a reputation for excellence in cultivating rare flowers, particularly tulips, and for designing enclosed gardens suited to urban houses and small estates.
In England, these sheltered flower gardens borrowed the idea of enclosure and intimacy. They were typically framed by clipped hedges, trelliswork, or low masonry walls, which created microclimates that allowed delicate flowers to thrive. Inside, designers laid out symmetrical beds filled with seasonal displays. The planting schemes emphasized color, fragrance, and the novelty of new varieties arriving through trade and exchange. Because the garden was contained and inward-looking, visitors experienced a vivid burst of concentrated beauty, very different from the vast perspectives and sweeping avenues of the wider Baroque landscape.
These Dutch-style gardens became places of retreat and contemplation. They allowed owners and guests to step away from the grandeur of terraces, avenues, and wildernesses and enjoy a more personal relationship with flowers. The sheltered design also made them practical. Wind-sensitive blooms could flourish, and gardeners could rotate displays more effectively, ensuring that visitors encountered something fresh from spring through autumn. This blend of display, novelty, and intimacy reflected the Baroque appetite for variety and spectacle, but on a smaller and more personal scale.
Comparison with parterres
The sheltered flower garden of Dutch inspiration differed in both scale and intent from the parterre, another hallmark of Baroque garden design. Parterres were expansive arrangements of patterned beds, usually positioned directly beside the house or at the center of the main garden axis. They were meant to be seen from above, either from windows, balconies, or terraces, and their primary effect came from geometry and design rather than from the individual plants themselves. Gravel paths often outlined intricate shapes filled with colored earth, clipped shrubs, or low flowers. From a distance, they worked like a living tapestry.
By contrast, Dutch-style sheltered gardens invited close inspection. Their beds were not meant to be appreciated only from upper windows but from within the space itself. Visitors could walk among the flowers, notice their scent, and admire the details of individual specimens. Where the parterre projected order and authority, the Dutch-inspired garden offered intimacy and immediacy.
Another distinction lay in their relationship to the larger garden. Parterres anchored the formal axis of the estate and proclaimed wealth and control to anyone approaching the house. The sheltered flower garden, on the other hand, functioned almost like a private chamber within the grounds. Its scale was modest, its access selective, and its atmosphere more personal. In this way, both features complemented each other: the parterre broadcasting grandeur to the world, and the Dutch-style flower garden providing a retreat for private enjoyment.
Together, these two elements highlight the range of experiences offered by Baroque garden design. The great parterre represented spectacle on a monumental scale, while the enclosed flower garden demonstrated refinement and taste through detail and horticultural skill. Both served as expressions of power, culture, and artistry, but in contrasting modes - one public and commanding, the other sheltered and intimate.
Wilderness garden rooms, in contrast
While parterres and Dutch-style sheltered flower gardens represented two ends of the Baroque spectrum, one monumental and outward-facing, the other intimate and enclosed, the wilderness garden room added yet another layer to the overall design. The wilderness was not wild at all, despite its name. It was a highly structured area planted with dense trees and hedges, divided into quarters by straight or sometimes curving paths. Inside these compartments, designers created garden rooms that acted as destinations along the walks.
These rooms, unlike parterres, were hidden from immediate view. Visitors would follow a path screened by greenery and then suddenly step into a clearing where a fountain, statue, or piece of topiary served as the centerpiece. The sense of discovery was central. Each room offered an element of surprise, whether through a sudden burst of light, the sound of running water, or the contrast between dark woodland and a bright open space.
In comparison with Dutch-style flower gardens, wilderness rooms emphasized structure and spectacle more than individual flowers. They were usually larger, framed by tall hedges, and designed to host gatherings or create theatrical moments. While a sheltered flower garden was intimate and personal, a wilderness room could feel like a stage set for performance, music, or social interaction. Some were named after their features (a fountain bosquet, a theatre bosquet, or a colonnade bosquet in the French tradition), while English versions sometimes used winding approaches that heightened privacy and seclusion.
The three elements together, parterre, sheltered flower garden, and wilderness room, created a balanced progression within Baroque estates. Visitors first encountered the parterre, a bold display of wealth and control meant to impress from a distance. Moving deeper, they might reach a Dutch-style flower garden, where they could admire rare plants up close in a calm and enclosed setting. From there, they could wander into a wilderness, where rooms unfolded one by one, offering surprises, performances, and theatrical experiences within a green maze.
This layered approach ensured that a Baroque garden was never one-dimensional. It offered scale and spectacle, intimacy and detail, drama and discovery, all within a single landscape. The contrast between these three types of garden spaces showed not only the artistry of their designers but also the cultural ideals of the time: mastery over nature, love of novelty, and the desire to entertain and astonish at every turn.

The rise of garden rooms in the late nineteenth and early twentieth centuries
By the end of the nineteenth century and into the early twentieth century, garden rooms became far more common. Designers and homeowners were moving away from the sweeping Victorian garden with its grand, flowing lines. They wanted spaces that felt human in scale. The cottage garden style, with dense planting and intimate corners, set the tone. A garden room suited that change. It offered privacy, structure, and a clear sense of place within larger grounds. This change shaped English garden design and helped popularize the idea of outdoor rooms defined by hedges, walls, and tall planting.
After World War I, the compartment garden took center stage
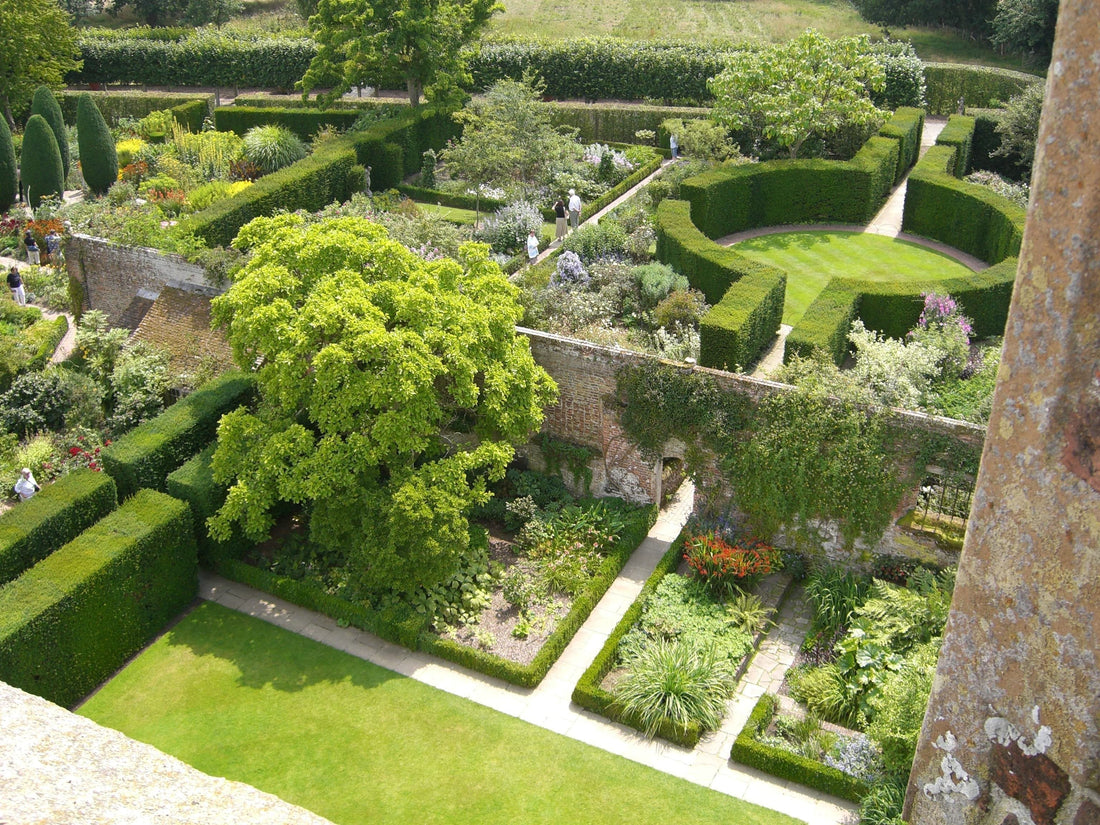
In the years after World War I, several influential English gardens were arranged as a chain of compartments. Sissinghurst Castle Garden, Hidcote Manor Garden, and Tintinhull Garden showed how powerful this layout could be. Each space functioned as its own world, yet linked to the next through gates, paths, and framed views. Visitors could move from one mood to another, which gave the whole site rhythm and clarity. This approach also made seasonal gardening easier. Specific areas could be planned for spring blossom, summer color, or autumn texture without visual clutter.
Sissinghurst Castle Garden and the art of the room
Most of Sissinghurst took shape during the 1930s. One space became world-famous later. The White Garden was planted in 1949 and 1950, although planning for it started before the Second World War. Its focus on white flowers and silver foliage created calm, unity, and a strong evening presence. Much of Sissinghurst stands on the remains of a larger country house that had been mostly demolished. Surviving walls were tall enough to divide the site into clear garden rooms. Those walls did more than mark boundaries. They shaped microclimates, supported climbers, quieted the wind, and framed key views.
Vita Sackville West built the garden with her husband, Harold Nicolson, who set out the structure. Vita then layered in the planting. She described the rooms as “a series of privacies... all a series of escapes from the world, giving the impression of cumulative escape.” That line captures why garden rooms work. Each enclosure offers calm on its own. Together, they build a deeper sense of retreat.
Hidcote and Tintinhull show the power of sequence
Hidcote became a landmark for garden rooms. Its sequence of enclosed spaces shows how walls, hedges, and narrow passages can turn a large property into a walk of surprises. You move from shade to sun, from rich color to quiet green, from formal shapes to looser planting. Tintinhull, developed from 1933 by Phyllis Reiss, refined the same idea at a smaller scale. It proved that a series of modest compartments can deliver clear structure, strong identity, and practical maintenance. Both gardens demonstrated how compartment design supports display planting, careful pacing, and year-round interest.
Dumbarton Oaks and the American expression of outdoor rooms
Dumbarton Oaks in Washington, DC, translated the outdoor room idea to a much larger property. Beatrix Farrand began work in 1922 and shaped the twenty-seven-acre garden as a linked set of rooms. Terraces, water features, and planted enclosures guide visitors through the landscape. Each area has its own theme and planting palette, yet sightlines tie them together. It is a lesson in how a large estate can feel coherent and walkable when broken into well-scaled outdoor spaces.
Ninfa in central Italy uses ruins as living walls
The garden of Ninfa in central Italy offers a different path to the same goal. There, the ruins of an entire village serve as the structure for its rooms. Roofless walls create ready-made boundaries. Doorways and arches become portals and frames. The softened edges of stone and brick blend with climbing plants and self-seeded flowers. The result is a sequence of garden rooms where history and planting merge, and where old masonry acts like hedges, screens, and windbreaks without feeling heavy.
Why this period still guides garden room design today
The work at Sissinghurst, Hidcote, Tintinhull, Dumbarton Oaks, and Ninfa set the template for modern garden rooms. Enclosure creates comfort. Clear transitions give pace. Strong bones let seasonal planting shine. Walls, hedges, and tall shrubs offer shelter and make microclimates. Paths and openings manage movement and reveal views. These lessons remain central to garden room design, English garden style, and outdoor living spaces worldwide. If you want a garden that feels private, legible, and beautiful through the year, the ideas born in this period still lead the way for anyone planning garden rooms and compartment gardens today.

Top 10 Best Garden Privacy Ideas on a Budget
Perfect privacy would come built in. Most of us do not have that. In busy neighborhoods, homes sit close together. Back fences open onto lanes or parks. Windows look straight into yards. The fix is not always a wall or a costly fence. Smart garden privacy ideas can shield sightlines and shape a calm outdoor retreat. Good screening also improves the overall garden design and makes the space feel intentional.
Increase boundary planting
Start with the edges. Build layers along the boundary to block views and soften noise. This is the most reliable low-cost way to add backyard privacy. Trees and shrubs create height, depth, and natural shade, which keeps the garden cool and quiet. A layered edge also looks richer than a bare fence and turns a flat plot into a series of green rooms.
Hornbeam trees work well for this job. They take pruning, handle many soils, and form a dense screen when clipped or trained. Even in winter, they often hold some dry leaves, which helps with cover when other plants are bare. Plant a simple row for a clean green wall, or pleach the trees to lift the canopy and free up ground space for seating or planting. Use a double staggered line if you need faster screening on small budgets. Younger trees, planted close and pruned early, fill in faster than one or two large specimens and usually cost less.
Think in layers from tall to low. Put the tallest trees along the boundary to set the ceiling. In front of them, use medium shrubs to close mid-height gaps. Add a lower belt of grasses or shade-tolerant perennials to hide the base and soften edges. This tiered structure cancels direct sightlines from next door and from upper windows, which makes overlooked patios feel secluded. If your yard sits a little lower than the street, the planting can wrap a sunken terrace and create a hidden pocket that feels private the moment you step down.
Trees are the backbone of garden screening. They give height, structure, and a clear focal point that anchors the layout. Choose species that match your space, light, wind, and soil. Evergreen trees and hedges provide steady cover through the year. Deciduous trees bring light in winter and seasonal color in spring and autumn. Both work for privacy. The key is to pick forms that fit the scale of your garden so the space stays usable.
A refined option for smaller spaces is Cercidiphyllum japonicum ‘Pendulum’. This weeping katsura stays medium-sized with a light, delicate canopy that does not overpower a compact yard. Its heart-shaped leaves open in spring with a soft bronze tint, then change to clear yellow and warm orange in autumn. That seasonal change keeps the screen interesting year-round while the airy habit prevents the space from feeling boxed in. Give it steady moisture and shelter from strong wind so the foliage stays fresh through hot spells.
Plan the boundary for both cover and character. Mix leaf textures and shades of green to avoid a heavy wall of one tone. Use plants that respond well to clipping where you want crisp lines, and looser shrubs where you want a softer feel. Leave a few framed openings to direct views to a feature inside the garden. Keep the main entrance wide enough to move furniture and tools without damaging branches.
Save money by buying bare-root trees and young whips in the dormant season. They establish quickly and cost far less than large container plants. Space them with the final density in mind, then prune early to encourage side branches and thick growth at eye level. Mulch well to hold moisture and suppress weeds. A simple soaker hose run along the line cuts water waste and speeds establishment. If you need instant cover while trees fill in, tuck in fast-growing shrubs and tall grasses at the front. These act as a temporary screen and can be thinned later.
Maintenance is simple but important. Water during dry periods in the first few seasons. Clip hornbeam and other hedging trees once or twice a year to keep the screen dense. Remove damaged or crossing branches to keep light moving through the canopy. Healthy, well-pruned boundary planting resists wind and bounces back after storms, which matters in exposed suburban plots.
Layered boundary planting does more than hide views. It calms wind, filters noise, and creates a kinder microclimate for tender plants. It frames outdoor rooms without hard barriers, which makes a small garden feel deeper. It also turns a plain fence line into a living feature that changes with the seasons. For overlooked yards on a budget, it is the most versatile and enduring privacy idea you can use.
Adding Planting Layers
Layering trees and shrubs is one of the most effective ways to create privacy without building a solid fence. Instead of relying on one tall hedge, mixing plants of different heights builds a tiered screen that looks natural and adds dimension. Tall trees form the upper canopy, medium shrubs fill in the middle, and ground-level planting ties everything together. This approach cancels sightlines, quiets noise, and creates a lush backdrop that feels like a living wall of green.
A formal take on layered planting uses topiary. Clipped box, yew, or holly can be shaped into domes, cones, or blocks to build structure. These shapes give a sense of order and elegance, turning the boundary into part of the design rather than just a barrier. The catch is maintenance. Topiary needs regular clipping to keep its lines sharp. If you enjoy pruning and want a garden that feels precise, it is worth the work.
If you want a softer and more relaxed garden, choose shrubs and small trees that keep their natural shape. Mixed hedges of viburnum, hazel, or dogwood blend with ornamental grasses and perennials to make a screen that changes with the seasons. This style takes less upkeep and has a more natural look, which is ideal if you prefer a wilder or less formal space.
The key is to think of the boundary as a layered stage. Each plant adds texture and color. Together, they provide privacy and depth, while also making the garden feel larger than it is.
Living Walls
Living walls, also called vertical gardens, turn plain boundaries into lush screens. They work especially well in small spaces like balconies, patios, and courtyards where ground planting is limited. Instead of looking at bare brick or a tired fence, you get a wall covered in greenery that hides flaws and doubles your planting space.
A living wall can be built with modular panels, pocket systems, or even simple trellises fixed to a boundary. The goal is to use vertical surfaces for plants that thrive in shallow soil and limited root space. Evergreen species are best for year-round coverage, but mixing in seasonal flowers adds bursts of color and keeps the wall interesting. Good choices include ivy for steady cover, Virginia creeper for bold autumn tones, honeysuckle and clematis for scent and bloom, and climbing hydrangea for a rich, leafy presence. Hydrangeas need careful pruning, so make sure you learn the right way to cut them back to keep them thriving.
Living walls do more than provide privacy. They cool surfaces in summer, absorb sound, and create habitats for insects and birds. With the right mix of plants, a vertical garden becomes a living tapestry that changes through the year.
If you want to extend the idea, consider arches or garden structures such as a simple ivy arch. These create entry points or shaded corners where climbing plants can grow, making the space feel enclosed and private. They also connect different parts of the garden and guide movement, all while adding greenery overhead.
The best results come from planning your plant mix carefully. Choose varieties that are disease-resistant, low-maintenance, and suited to the amount of light your wall gets. With the right setup, a living wall can transform a small outdoor space into a private, vibrant retreat.
Dividing and Screening Areas with Arbours and Arches
Arbours, arches, and even planted tunnels can change the mood of a garden from ordinary to striking. When covered in climbing roses, honeysuckle, or other flowering vines, they become living structures that provide both beauty and privacy. These features do more than decorate. They can screen a pergola from view, hide seating areas, or break up a wide open garden into smaller sections that feel more personal.
Arches also work well as gateways. Walking through one signals a change of space, leading visitors from one garden room into another. Each section can then hold its own planting style, colors, or theme, which gives the garden more variety and rhythm.
In small gardens, the trick is using an arbour to shape perspective. When framed by dense planting, an arbour at the far end of the plot draws the eye forward. This creates an illusion of depth and makes the garden feel larger than it is. The structure itself becomes a focal point, while the climbers add seasonal interest with flowers, scent, and changing foliage. For compact yards, this is one of the simplest ways to gain privacy and character without taking up much floor space.
Screen Planting
Not every corner of a garden looks good. Compost heaps, bins, and storage sheds are useful but rarely attractive. Screen planting hides these spots so the entire outdoor space feels polished and welcoming. This is especially important in smaller gardens where every square foot is visible and the space often doubles as a main outdoor living area.
Screening can be done in many ways, depending on what needs to be hidden and where it sits in the layout. Trellis panels fixed to a fence are a quick option. Train evergreen climbers such as jasmine or star clematis up the trellis for year-round cover. Edible plants like beans or cucumbers can climb in summer, giving the screen both beauty and function. In tight gardens, this dual-purpose approach saves space while improving privacy.
Attractive storage also plays a role. Simple painted cupboards or timber boxes blend better than plastic bins and keep the garden looking cared for all year. Place them behind a planting screen for extra cover. Even tall ornamental grasses or bamboo in large containers can mask a compost area or a small shed without major cost or effort.
The goal of screen planting is balance. It should hide the practical elements while still looking good enough to feel like part of the design. When done well, the eye is drawn to the plants and textures rather than what lies behind them, turning once awkward corners into discreet and well-integrated parts of the garden.
Extra Colour and Privacy in the Garden
Privacy does not have to come at the cost of style. A good outdoor retreat feels both secluded and alive with character, and adding colour is one of the best ways to achieve that balance. Plants will always be the backbone of screening, but other features can bring shade, texture, and an extra sense of enclosure.
A practical option is to use a garden awning. These coverings stretch out over patios and seating areas, casting deep shade while blocking unwanted views from above. When fitted at a height of six feet or more, an awning creates a roof-like layer that helps define the space as a private zone. Some designs stop at the edge of the canopy, giving a bright café-style look that pairs well with outdoor dining. Others extend fully down the sides, turning the area beneath into a sheltered nook. Those models not only prevent onlookers from seeing in but also shield you from wind, rain, or strong sun, making the garden more usable in every season. Choosing an awning with a bold colour or pattern adds personality and turns privacy into a design feature instead of just a barrier.
Planting Shrubs for Privacy
Shrubs are another reliable tool for shaping private corners. Unlike tall trees, which take years to reach their full height, many shrubs grow quickly, forming dense screens in just a few seasons. They also add variety, with flowers, berries, and evergreen leaves that change the mood of the garden throughout the year. The right mix provides both privacy and visual richness, and it also supports birds, bees, and other wildlife.
Laurel is a classic choice, producing thick evergreen foliage that blocks views all year. Holly offers glossy leaves and bright red berries in winter, bringing seasonal colour along with cover. Rhododendron delivers bold blooms in spring and forms a substantial evergreen mass through the rest of the year. Privet grows fast, clips neatly, and adapts well to urban plots. Photinia stands out with its red new growth, adding a splash of colour to the screen. Honeysuckle climbs quickly, weaves through supports, and perfumes the air when in flower. Forsythia bursts into bright yellow blossoms in early spring, providing both privacy and a dramatic seasonal display.
Combining several of these shrubs creates layers that feel natural and provide steady screening throughout the year. Fast growers can fill gaps while slower, more structural plants mature in the background. This blend not only speeds up the process of achieving privacy but also ensures the garden remains vibrant and inviting rather than closed off.
Use Ornamental Grasses for Light Screening
Not everyone spends time outdoors year-round. Many people only use their gardens in spring and summer, when the weather makes it comfortable to sit outside. If that is you, tall ornamental grasses and bamboo can be an excellent privacy choice. These plants grow quickly, add movement, and create a natural screen without blocking out the sun. They let in light and air while softening views from nearby windows or overlooking balconies.
This type of planting is especially effective around patios, seating zones, or sun loungers where you want privacy but not heavy shade. Taller species like miscanthus, pampas grass, or clumping bamboo can grow into impressive screens that sway in the breeze, bringing life and texture to the garden. They look lighter than solid fences and are often cheaper than building permanent barriers.
Another option is planting a medium-sized feature tree where privacy is needed most. If your bedroom window looks out onto a neighbor’s property, a well-placed tree can block the view without overwhelming the space. Upright ornamental cherry trees or slender ornamental pears like Pyrus ‘Chanticleer’ are reliable choices. They stay relatively narrow, add seasonal flowers or color, and create a soft shield. Just make sure to plant them far enough from the house to avoid root and structural issues as they mature.
Build a Summerhouse or Pavilion
If you have the space, adding a summerhouse is one of the most versatile privacy solutions. Positioned along the garden boundary, the solid walls and roof naturally block sightlines, giving you an enclosed and sheltered retreat. The structure itself becomes both a screen and a usable living area, perfect for reading, hobbies, or quiet afternoons outdoors.
For added charm, hide the summerhouse slightly behind shrubs, small trees, or flowering plants. This creates an extra layer of seclusion and turns the approach into a journey. A winding path lined with greenery that leads to the hidden retreat makes the garden feel larger and more inviting. The building feels like a secret hideaway rather than a plain shed in the corner.
Where space is tight, you do not need a full summerhouse to get the same effect. An arbour seat, when placed against the boundary, can create a sheltered nook. The overhead frame and side panels give instant enclosure, while climbing plants such as roses or clematis can be trained over it for more cover and seasonal beauty. Even in small gardens, this simple addition provides privacy, comfort, and a focal point that draws you outdoors.
Both grasses and garden buildings work well alone, but the strongest results come from using them together. Tall plants soften the look of solid structures, while a summerhouse or arbour provides a backdrop that makes ornamental grasses stand out. This mix creates layers of screening that look natural and balanced, delivering privacy without making the garden feel closed off.
By choosing fast-growing plants and modest structures, it is possible to achieve real privacy on a budget. Grasses, bamboo, and upright trees give height and softness for little cost, while a simple timber arbour or small summerhouse provides lasting shelter and new ways to enjoy the space. Together, they show how garden privacy can be practical, affordable, and beautiful at the same time.
Aquatic water features
Water is one of the most underrated tools for creating privacy in a garden. Most people think first of fences, walls, or hedges, but sound is just as important as sight. A simple water feature can transform how a space feels by softening noise from traffic, neighbors, or nearby streets. The steady movement of water adds a layer of calm that makes the garden feel more secluded, even if the boundary is visually open.
Fountains, bubbling stones, and wall-mounted spouts are all effective because they create continuous sound. That flowing rhythm masks background noise and makes voices less likely to carry. This means you can talk or relax outdoors without feeling overheard. A water feature also draws the ear inward, pulling attention to the garden itself and away from unwanted distractions beyond the fence.
The trick is balance. Too weak a trickle gets lost, while a harsh jet can feel loud and intrusive. The goal is a steady, soothing sound that blends naturally into the garden. Placement is just as important as style. Position the feature near a seating area or along a boundary that faces the noisiest side of the property. That way, the sound reaches where it’s needed most.
Design also matters. A water feature should match the tone of the landscape. A modern courtyard might work best with a sleek stainless steel spout or geometric fountain. A cottage garden may suit a stone trough or tiered urn where water slips gently over the edges. Even small gardens can benefit from a compact wall fountain or a freestanding bowl, proving that size is not a barrier to enjoying the effect.
Beyond privacy, moving water brings life into a garden. Birds are drawn to it for drinking and bathing, adding to the sense of a natural, vibrant space. Reflections from the water surface catch light and create subtle movement, giving even still corners a dynamic feel. With careful choice and placement, a water feature can become both a centerpiece and a practical way to secure peace and quiet outdoors.

How to Get Privacy in Your Garden
Map sightlines for garden privacy
Start by walking your space and seeing what others can see. Look from nearby windows, balconies, and paths. Stand where you plan to sit or eat outside. Note the angles that feel exposed. Your goal is to block those exact views, not the whole garden. When you target sightlines, you use less material, keep more light, and get stronger garden screening where it matters.
Use garden zoning to create secluded areas
Break the garden into clear zones so each area feels private and calm. A dining corner, a reading nook, a kids' play patch. Shape these with gentle changes in level, narrow paths, small gateways, or a change in paving. Zoning guides the eye and slows movement, which makes spaces feel tucked away even in a small garden. It also helps your planting do double duty as both a backdrop and a screen.
Plant layered screening for soft privacy
Plants give privacy that looks natural and ages well. Think in layers. Use tall grasses and upright perennials at the front to blur edges and soften lines. Place shrubs or small trees behind them for height and structure. Mix evergreens for year-round cover with seasonal plants for color. Keep spacing tight enough to close gaps by midsummer but open enough for air and light. Water new plants well, mulch to hold moisture, and prune lightly to keep a dense surface. If you want fast results, use larger container plants to anchor each zone, then fill around them with younger plants that will knit together.
Tall ornamental grasses are ideal when you want movement and privacy without hard barriers. They rise quickly, sway in the breeze, and catch light. Use them to outline a seating area or to edit a view from a neighbor’s window. In winter, leave the spent plumes up for texture, then cut them back in late winter to make room for fresh growth.
Choose screening materials that match your garden style
Hard screens boost privacy where plants alone are not enough. Pick materials that suit your house and planting so the result feels intentional.
Bamboo offers quick cover and a calm look. Use clumping bamboo to avoid spread. Install a root barrier if you are unsure of the variety. Give it steady water and clip the tops to hold a flat, even line.
Metal garden screens add pattern and strong shadows. Powder-coated steel resists rust and comes in many colors. Perforated panels filter views while letting air and light through. Fix them to solid posts set in concrete so they can handle wind.
Wooden fence panels bring warmth and a natural tone. Use durable species like cedar or larch. Keep boards vertical for a taller look or use narrow slats with small gaps to let light pass and reduce wind pressure. Treat the wood with oil or stain and check it each spring. A slim timber trellis in front of a fence can hold climbers and add depth without taking much space.
You can combine materials with plants for layered garden screening. A slim metal screen behind a line of tall grasses hides the base and shows only filtered pattern above. A timber trellis in front of evergreen shrubs deepens the wall and improves sound absorption while keeping a green face.
Build overhead privacy with a pergola
If the problem is a view from above, use a pergola to cap the space. Set the posts square and level. Space rafters close enough to break sightlines but far enough to keep the area bright. For instant cover, tie rush matting across the top. It filters glare, softens shadows, and is easy to replace when it weathers. For living shade, train climbers like ivy or clematis over the structure. Ivy holds leaves all year and gives steady cover. Clematis adds flowers and seasonal drama. Combine both so you get reliable screening with color in spring and summer. Check the load on the frame, water new vines often, and guide stems along wires until they fill the grid.
Plan ahead for sheds and larger structures
Before you add big features such as sheds or tall garden buildings, check local rules and any planning permission you might need. Measure heights, mind the distance from boundaries, and speak with neighbors if a new screen could affect their light. Good planning prevents disputes and keeps your project on schedule.

How to Stop Neighbours Overlooking Your Garden
Many people reach for the tallest fence they can buy. It feels quick and final. In reality, it can create new problems. A fence taller than 6 feet or 2 meters can trigger planning permission, spark arguments, and throw deep shade across beds. It also locks you into limited planting because roots and canopies need room and light. If your goal is real garden privacy, a high wall is rarely the best first move.
Start with a clear look at the site
Walk your garden slowly and look back at it from every angle. Stand where you sit, cook, and read. Check the upstairs windows next door, roof terraces, and raised decks. Trace the sightlines that reach you. You will often find corners that are already hidden. Ask yourself why you do not use those quiet spots. Note the path of the sun and the windy edges. Privacy needs change with time of day and season, so write down when you want cover most, whether that is morning coffee, weekend lunches, or summer evenings.
Use planting for natural garden privacy
Plants create soft screens that feel calm and let light through. Think in layers. An evergreen backbone gives year-round cover. Deciduous trees add high canopies that block views from above in summer while letting winter light in. Tall grasses sway and blur sightlines. Climbers such as jasmine or honeysuckle on trellis can screen a view without feeling heavy. Pleached trees provide a raised green panel that sits above head height and guards the space while keeping the ground open for paths and beds.
Choose species for mature size, not just the look in the pot. Set plants a little inside the boundary so you can maintain both sides without stepping into a neighbour’s land. In small spaces, use large planters on wheels to build a movable privacy screen that you can rotate with the seasons. This approach supports privacy planting, garden screening, and good airflow at the same time.
Add smart screening and structures
You do not need a solid wall to stop a view. A light screen placed close to a seat blocks a line of sight better than a taller barrier at the edge. Lattice panels, slatted screens, and fine woven reed filter views while keeping sun and breeze. A pergola over a dining area with slim posts and climbing plants hides you from upstairs windows and keeps the space bright. An arbor at an entry can redirect the eye and turn a path so the view stops short of your seating.
Think about angles. If a neighbour looks down from the side, an angled screen near the table will cut that exact line. If the view comes from the back, a narrow trellis with climbers can stand behind a bench and break the sightline without darkening the whole garden. These garden privacy ideas protect your use of the space while preserving light and sky.
Balance light, shade, and airflow
Solid barriers cast deep shade and can trap cool, damp air. Semi-open materials soften the view without closing the garden. By using gaps between slats and layers of foliage, you get privacy with healthy light for herb beds, fruit bushes, and lawn. Your plants will thank you, and you will keep a pleasant microclimate for daily use.
Plan legally and politely
There is a practical reason to think before building a tall fence. Anything over about 6 feet or 2 meters may require planning permission, and it often leads to neighbour disputes. Speak to your neighbour early. Explain that you are solving a privacy issue, not trying to build a fortress. Confirm the property line. Agree on how both sides will be maintained. Make sure nothing you add leans into their space or blocks their access. If permission is needed, discuss it together before you start to avoid stress later.
Use layout to your advantage
Rearrange the garden so the private life happens in the most sheltered zones. Move the dining table into a tucked corner by a hedge. Place a reading chair where a shed or mature shrub already screens you. A low water feature near a seating area can mask conversation and make the garden feel more secluded without adding height. Position outdoor lighting so it glows downward and inward. This keeps your area cosy and stops glare that draws attention from next door.
Match privacy to the times you use the garden
Focus effort where it matters most. If evenings are the issue, screen the side that catches the neighbour’s view at sunset. If the morning patio is overlooked by a balcony, add a slim pergola with climbers or a tall planter cluster in that exact spot. Seasonal thinking matters too. You may want dense cover near the terrace in summer and lighter structure over winter for sun.
A simple plan that works
Identify the sightlines and the hours when you feel watched. Use the hidden places you already have. Add layered planting, angled trellis, and a few focused screens close to where you sit. Keep barriers modest, light, and friendly to plants. Talk to your neighbour, check for any permission, and make sure nothing crosses the line. This mix of garden design for privacy, careful planting, and smart layout will stop neighbours overlooking your garden while keeping sunlight, airflow, and goodwill intact.

The Best Plants for Privacy Screens
Turning your garden into a private retreat often comes down to smart planting. Raised garden beds set along the edges of your outdoor space can do more than just frame the layout. When filled with tall, fast-growing plants, they create living barriers that give you seclusion while still letting in light and movement.
Bamboo is one of the most effective choices for this purpose. Its upright canes and dense foliage rise quickly, forming a wall of greenery that softens the view without closing it off completely. Unlike a solid fence, bamboo lets in dappled light, so the area still feels bright and open. With the right species, you can keep growth manageable and avoid it spreading where it isn’t wanted.
Ornamental grasses offer another option. Varieties that reach impressive heights, such as Miscanthus or Pampas grass, sway with the breeze and add a sense of motion to the boundary. These grasses change with the seasons, giving you fresh interest throughout the year. In summer, they form thick screens, and in autumn, they bring golden tones that warm up the garden.
For a more unusual touch, Carex pendula works well in shaded areas or alongside other plantings. Its arching leaves and tall flower spikes create a flowing curtain-like effect, offering privacy while blending naturally into both modern and traditional garden styles.
Unlike heavy fences or walls, these plant-based screens feel lighter and more welcoming. They provide privacy without creating a boxed-in atmosphere, much like sheer curtains that filter views while still allowing light to pour in. By choosing plants that match your climate and garden style, you can design a boundary that feels protective, alive, and visually engaging all year long.
Growing and Maintaining Plant Privacy Screens
Creating a natural privacy screen is not just about choosing tall plants, but also about understanding how to keep them healthy so they perform well over time. Each plant has its own needs, and knowing how to manage them ensures your screen stays dense, attractive, and reliable year after year.
Bamboo requires thoughtful care because of its rapid growth. Clumping types are usually the safest choice for gardens, as they expand slowly and stay contained. Planting bamboo in raised beds or root barriers prevents unwanted spreading. Regular watering during dry periods keeps the foliage lush, and thinning older canes once a year encourages new shoots to grow strong and upright.
Tall ornamental grasses thrive in sunny spots with well-drained soil. Many varieties are drought-tolerant once established, which makes them low-maintenance compared to other privacy plants. Cutting back the grasses in late winter before new growth appears keeps them tidy and ready for the next season. Adding compost or mulch at the base helps maintain moisture and improves soil quality.
Carex pendula grows best in moist, partially shaded areas. It naturally forms cascading layers that look like flowing green drapery. To maintain its shape, you can trim away old or damaged leaves in spring. Because it prefers damper soil than many other grasses, it is a good option for gardens near streams, ponds, or shaded corners that need soft screening.
Another key step in keeping any plant-based screen effective is planting densely enough for coverage but leaving space for airflow. This prevents disease and allows each specimen to develop fully. Over time, the result is a screen that feels intentional rather than crowded.
By giving attention to soil, spacing, and seasonal care, these plants not only create privacy but also become long-lasting features that enhance the structure and beauty of the garden.
Designing Layouts for Living Privacy Screens
The way you arrange plants is just as important as the species you choose. Layout determines how well the screen blocks views, how natural it looks, and how it interacts with the rest of the garden. Different planting patterns can create very different effects, from clean and structured to soft and layered.
A straight line of plants along a boundary is the most traditional layout. This works well for narrow spaces or when you want a tidy, formal look. Bamboo or tall ornamental grasses in a row provide immediate structure and a sense of order. This approach is best for gardens that need a clear separation between spaces without sacrificing light.
A staggered pattern creates a more natural and layered effect. By alternating plants in two or three rows, the screen develops greater depth, which makes it harder to see through and also adds texture. For example, you could plant Miscanthus in the front row and taller bamboo behind, allowing the grasses to soften the wall-like presence of the bamboo. This design works especially well in larger gardens where there’s space to create a sense of flow.
Curved layouts add another level of visual interest. Instead of a rigid barrier, the plants follow gentle arcs, which can guide the eye through the garden and create pockets of privacy in different corners. A curved screen can also make small gardens feel bigger, as the lines draw you around instead of stopping your view abruptly.
Raised beds can be integrated into these layouts to add height where needed. They also give more control over soil conditions, which is useful if your chosen plants require different growing environments than your natural ground provides.
Mixing plant heights and textures makes the screen feel dynamic rather than flat. For example, combining the tall, upright structure of bamboo with the flowing leaves of Carex pendula creates contrast that is both functional and visually appealing. Seasonal variation also plays a role. Grasses that change color through the year can transform the mood of the garden, while evergreens keep coverage consistent.
The goal of design is balance. A privacy screen should block unwanted views without feeling like a wall. The best layouts protect the garden while still inviting light, air, and movement.
Seasonal Interest in Plant Privacy Screens
A well-designed privacy screen should offer more than coverage in one season. By thinking about how plants change throughout the year, you can create a screen that not only blocks views but also brings fresh character to your garden month after month.
In spring, many grasses and bamboos begin sending up new shoots, filling gaps left after winter cutbacks. This is the season when the screen starts to rebuild itself, often with bright green foliage that feels fresh and vibrant. If you’ve planted ornamental grasses, their early growth creates soft mounds that quickly expand into dense barriers.
Summer is when most plant screens reach their peak. Bamboo holds strong vertical lines, while tall grasses stretch upward and begin to flower. This is the time when your screen feels most solid, providing reliable privacy while adding motion and texture. The warm months also highlight the contrast between species, with different shades of green and distinct leaf shapes playing against one another.
As autumn arrives, grasses steal the spotlight. Varieties like Miscanthus turn golden, copper, or burgundy, and their plumes rise above the foliage, catching the light. These seasonal changes give the screen warmth and richness while maintaining coverage. Bamboo stays evergreen, offering a consistent backdrop to the changing tones of the grasses.
Winter requires special planning. Many grasses die back, leaving the structure more open. To keep privacy intact, it helps to combine deciduous species with evergreens. Bamboo, certain hardy sedges, and other year-round plants carry the screen through the cold months. The bare stalks of grasses can still offer texture if left standing, and in frosty conditions, they create striking silhouettes.
By blending plants with different seasonal strengths, you can design a privacy screen that never feels empty. The garden gains variety, rhythm, and a sense of change, while still offering seclusion every day of the year.
Environmental Benefits of Living Privacy Screens
Plant-based privacy screens do more than create seclusion. They also improve the environment around them, turning a simple garden feature into a natural support system for both people and wildlife.
One of the most noticeable benefits is habitat creation. Tall grasses, bamboo, and sedges provide shelter for birds, insects, and small animals. Birds often use dense bamboo stands for nesting and cover, while ornamental grasses offer seeds and safe hiding places. Even in smaller gardens, a living screen can attract pollinators like bees and butterflies, adding life and movement to the space.
These plants also improve air quality. Their leaves capture dust and filter pollutants, while the process of photosynthesis releases fresh oxygen. When planted in rows or clusters, privacy screens can act as natural air filters for your garden, especially useful in urban areas where traffic and construction contribute to poor air conditions.
Temperature control is another advantage. Green screens lower surrounding heat by providing shade and releasing moisture through transpiration. This cooling effect can make outdoor spaces more comfortable during hot summers and reduce the need for artificial cooling indoors when screens are planted near walls or windows.
Wind protection is equally valuable. Tall, dense plantings slow down gusts, shielding delicate flowers or vegetables and making seating areas more comfortable. Unlike solid walls, which can cause turbulence, a layered screen breaks up the wind gently, creating a calmer microclimate.
Moisture regulation also plays a role. The roots of these plants help stabilize soil, reduce erosion, and retain water. In wetter areas, species like Carex pendula thrive in damp soil, absorbing excess moisture while still contributing to privacy.
Altogether, living privacy screens combine beauty with function. They not only protect your space visually but also clean the air, cool the garden, support wildlife, and balance the climate around them.
Pull it all together
Start with sightlines, set zones, then layer plants with the right screening materials. Use tall grasses and upright shrubs for soft edges. Use bamboo, metal panels, or wooden fence panels where you need stronger cover. Add a pergola for views from above and finish with rush matting or climbing plants like ivy and clematis. This focused approach to garden privacy keeps your outdoor living space calm, useful, and beautiful. It also reads cleanly for search terms like garden privacy, garden screening, privacy plants, pergola privacy, bamboo screening, metal garden screens, and wooden fence panels without forcing keywords or losing clarity.

